
Meta Ads setup
Updated
Meta & Shopify Add Setup
This guide walks you through setting up your Facebook Page, Meta Business Portfolio, Shopify–Meta connection, product catalog, and first Meta advertising campaign.
1. Create a Facebook Page
-
Go to Facebook → Create Page.
-
Select Business or Brand.
-
Enter:
- Page Name: Your store or brand name
- Category: For example, Clothing Store or E-commerce Website
-
Add your:
- Profile Picture: Your brand logo
- Cover Photo: Your brand cover image
- About Information: Website URL, business description, and contact details
-
Complete the Page setup.
2. Set Up Meta Business Portfolio
-
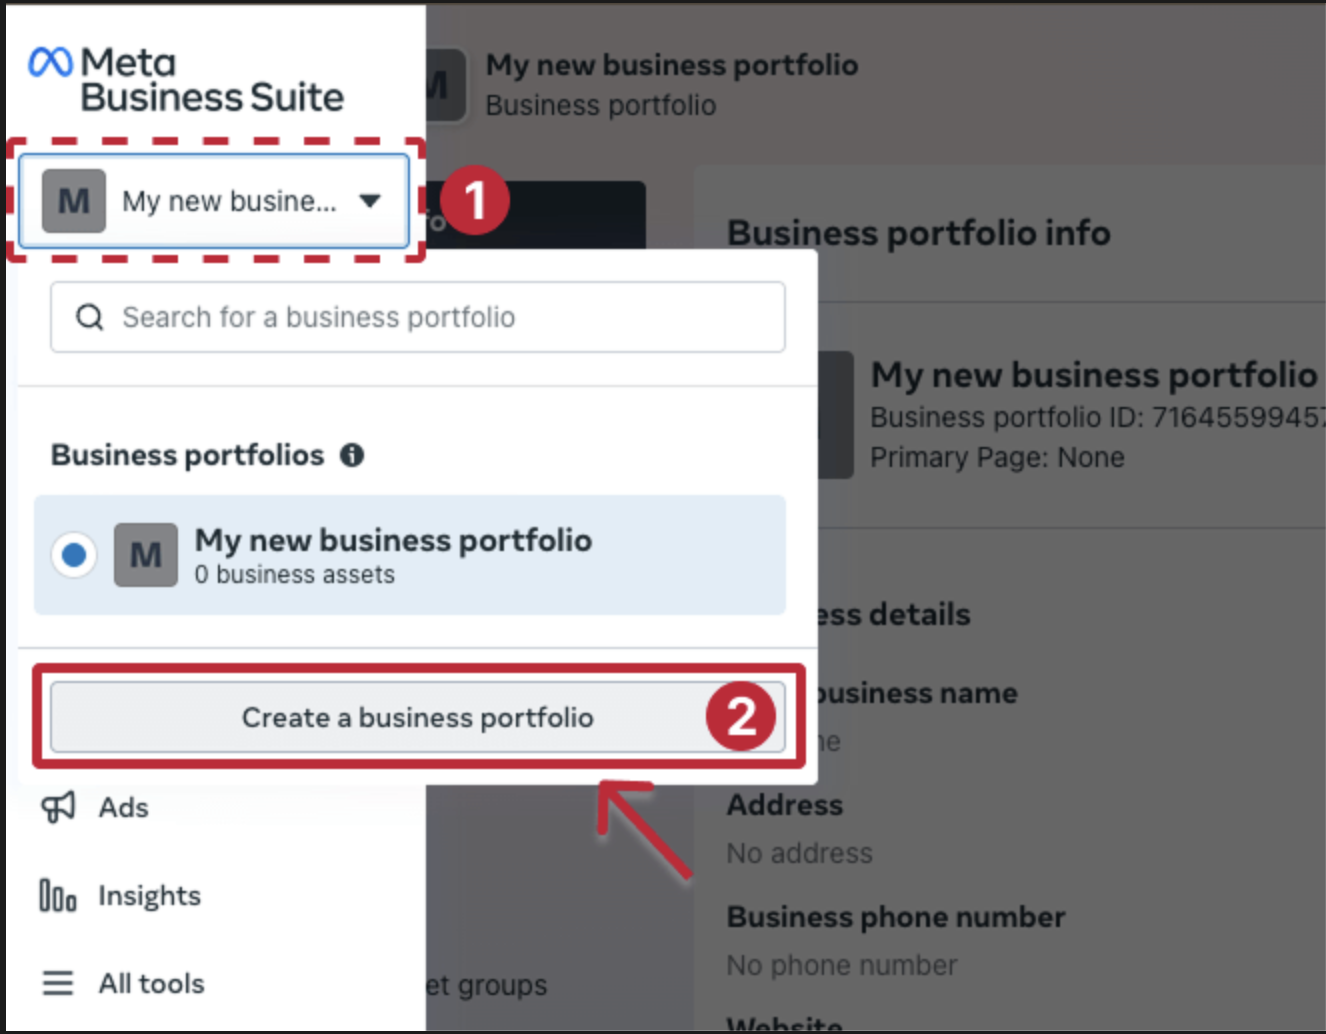
Go to Meta Business Suite → Create Account.
-
Enter your business name, name, and business email.
-
Verify your email address.
-
Go to Business Settings → Accounts → Pages.
-
Add or claim the Facebook Page you created.
-
Go to Accounts → Ad Accounts → Create New Ad Account.
-
Configure:
- Ad Account Name
- Time Zone
- Currency
-
Go to Users → People and invite team members if required.
-
Assign the appropriate permissions, such as Admin, Advertiser, or Analyst.
-
Go to Payments and add a payment method to the ad account.
Note: Choose the correct time zone and currency when creating the ad account, as these settings may not be changeable later.
Expected Result: Your Meta Business Portfolio, Facebook Page, Ad Account, users, and payment method are configured.
3. Connect Shopify with Meta
3.1 Install Facebook & Instagram Channel
-
In Shopify Admin, go to Settings → Apps and sales channels.
-
Open the Shopify App Store and search for Facebook & Instagram by Meta.
-
Install and open the app.
-
Click Get Started.
-
Log in using the Facebook account that has admin access to your Meta Business Portfolio.
-
Select:
- Business Portfolio
- Facebook Page
- Instagram Account
- Ad Account
-
Under Data Sharing, select Maximum.
-
Accept the terms and complete the setup.
4. Sync Products & Set Up Product Catalog
4.1 Enable Products for Meta
- Go to Shopify Admin → Products.
- Select the products you want to advertise.
- Click Bulk Edit or Publishing → Manage Sales Channels.
- Select Facebook & Instagram.
- Click Save.
Note: Only products available to the Facebook & Instagram sales channel can be synced to Meta.
Expected Result: Selected Shopify products are available for synchronization with Meta.
4.2 Verify the Meta Catalog
-
Go to Meta Business Settings → Data Sources → Catalogs.
-
Select the Shopify-created catalog.
-
Click Open in Commerce Manager.
-
Go to Items or Data Sources.
-
Verify that your Shopify products are appearing correctly.
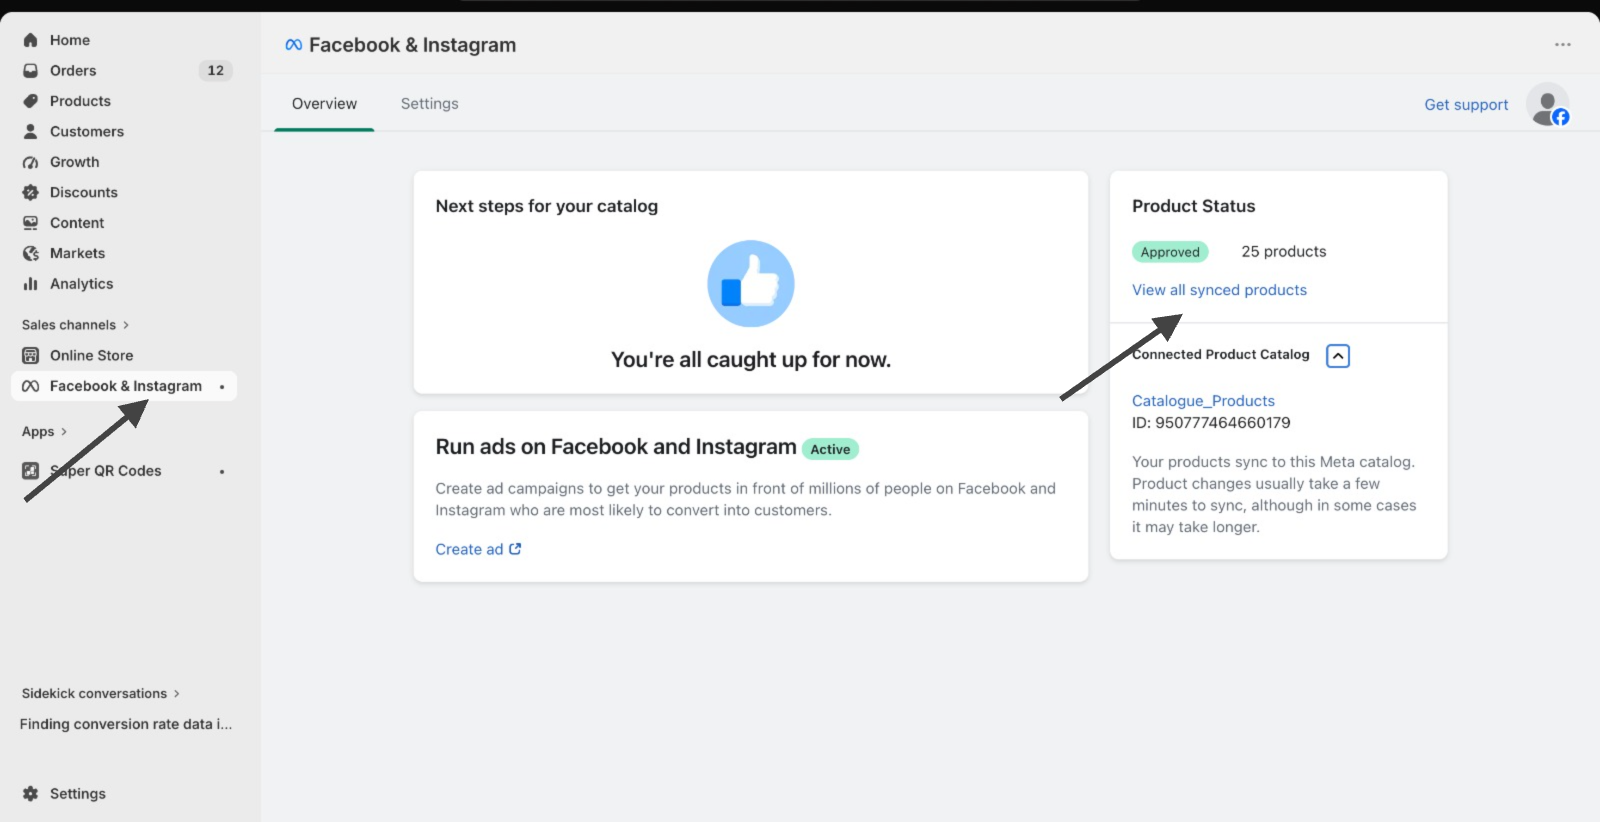
Expected Result: Your Shopify products are successfully synced and available in the Meta Product Catalog.
5. Campaign Structure & Launch
5.1 Choose Campaign Objective
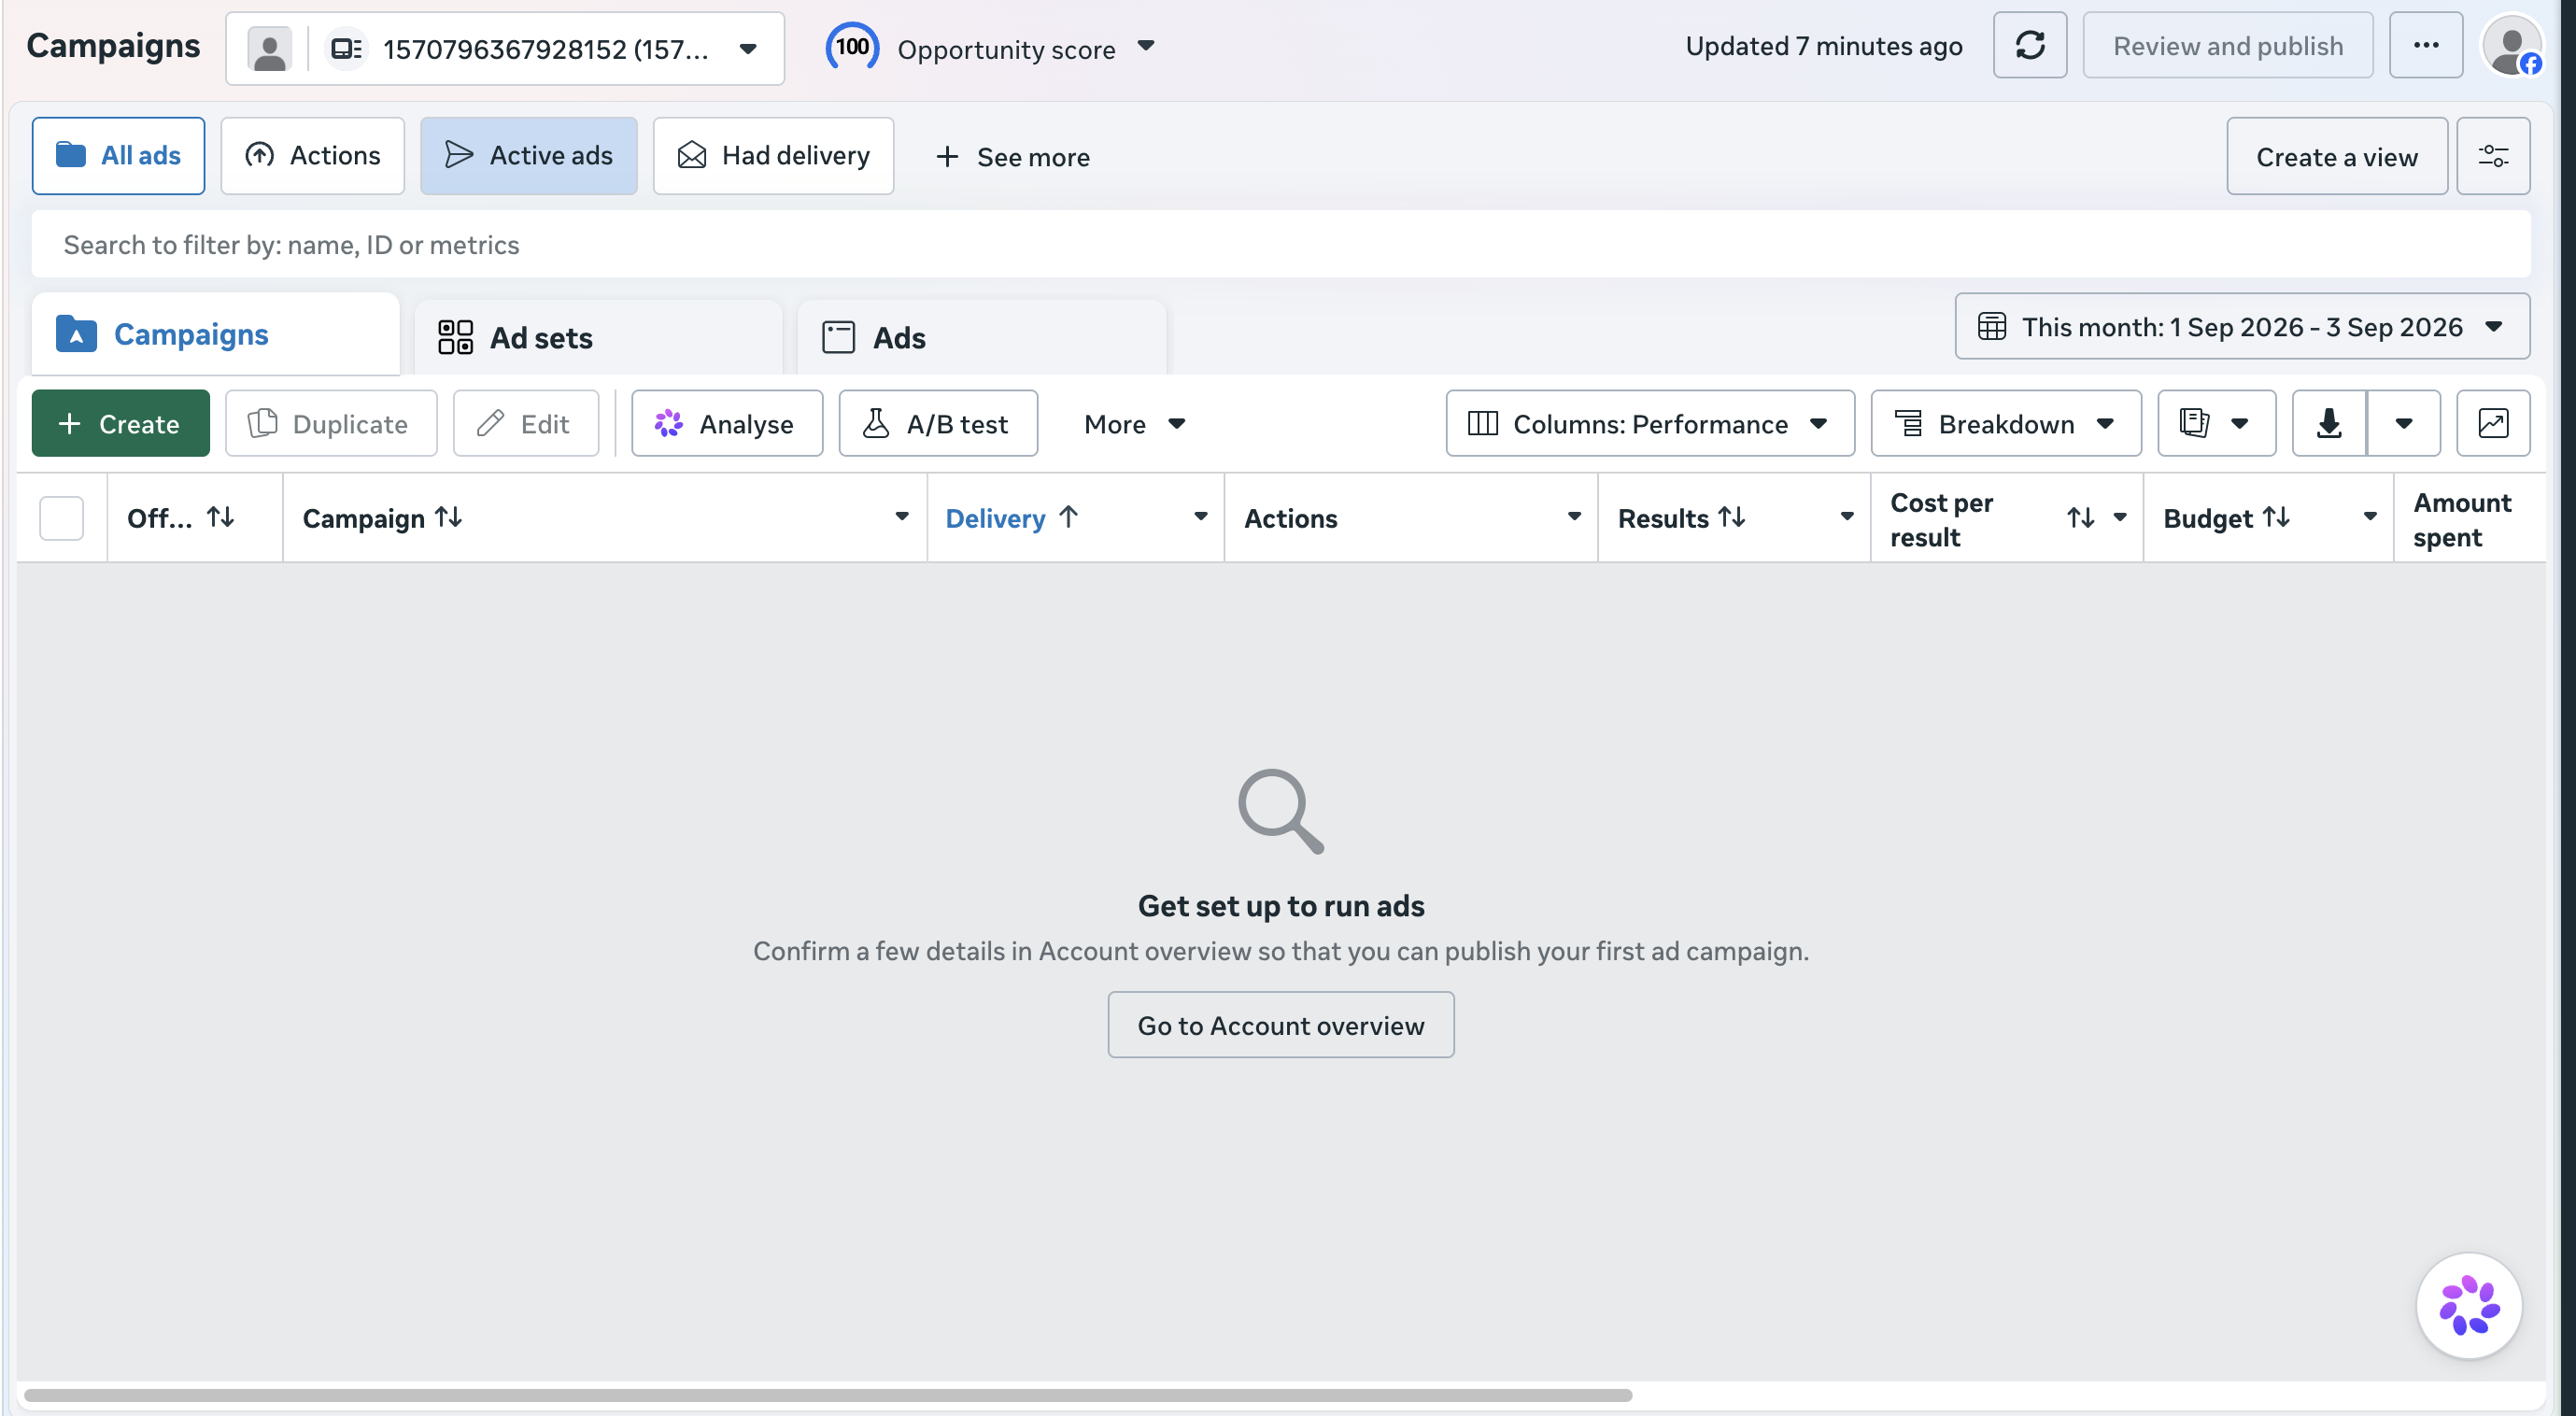
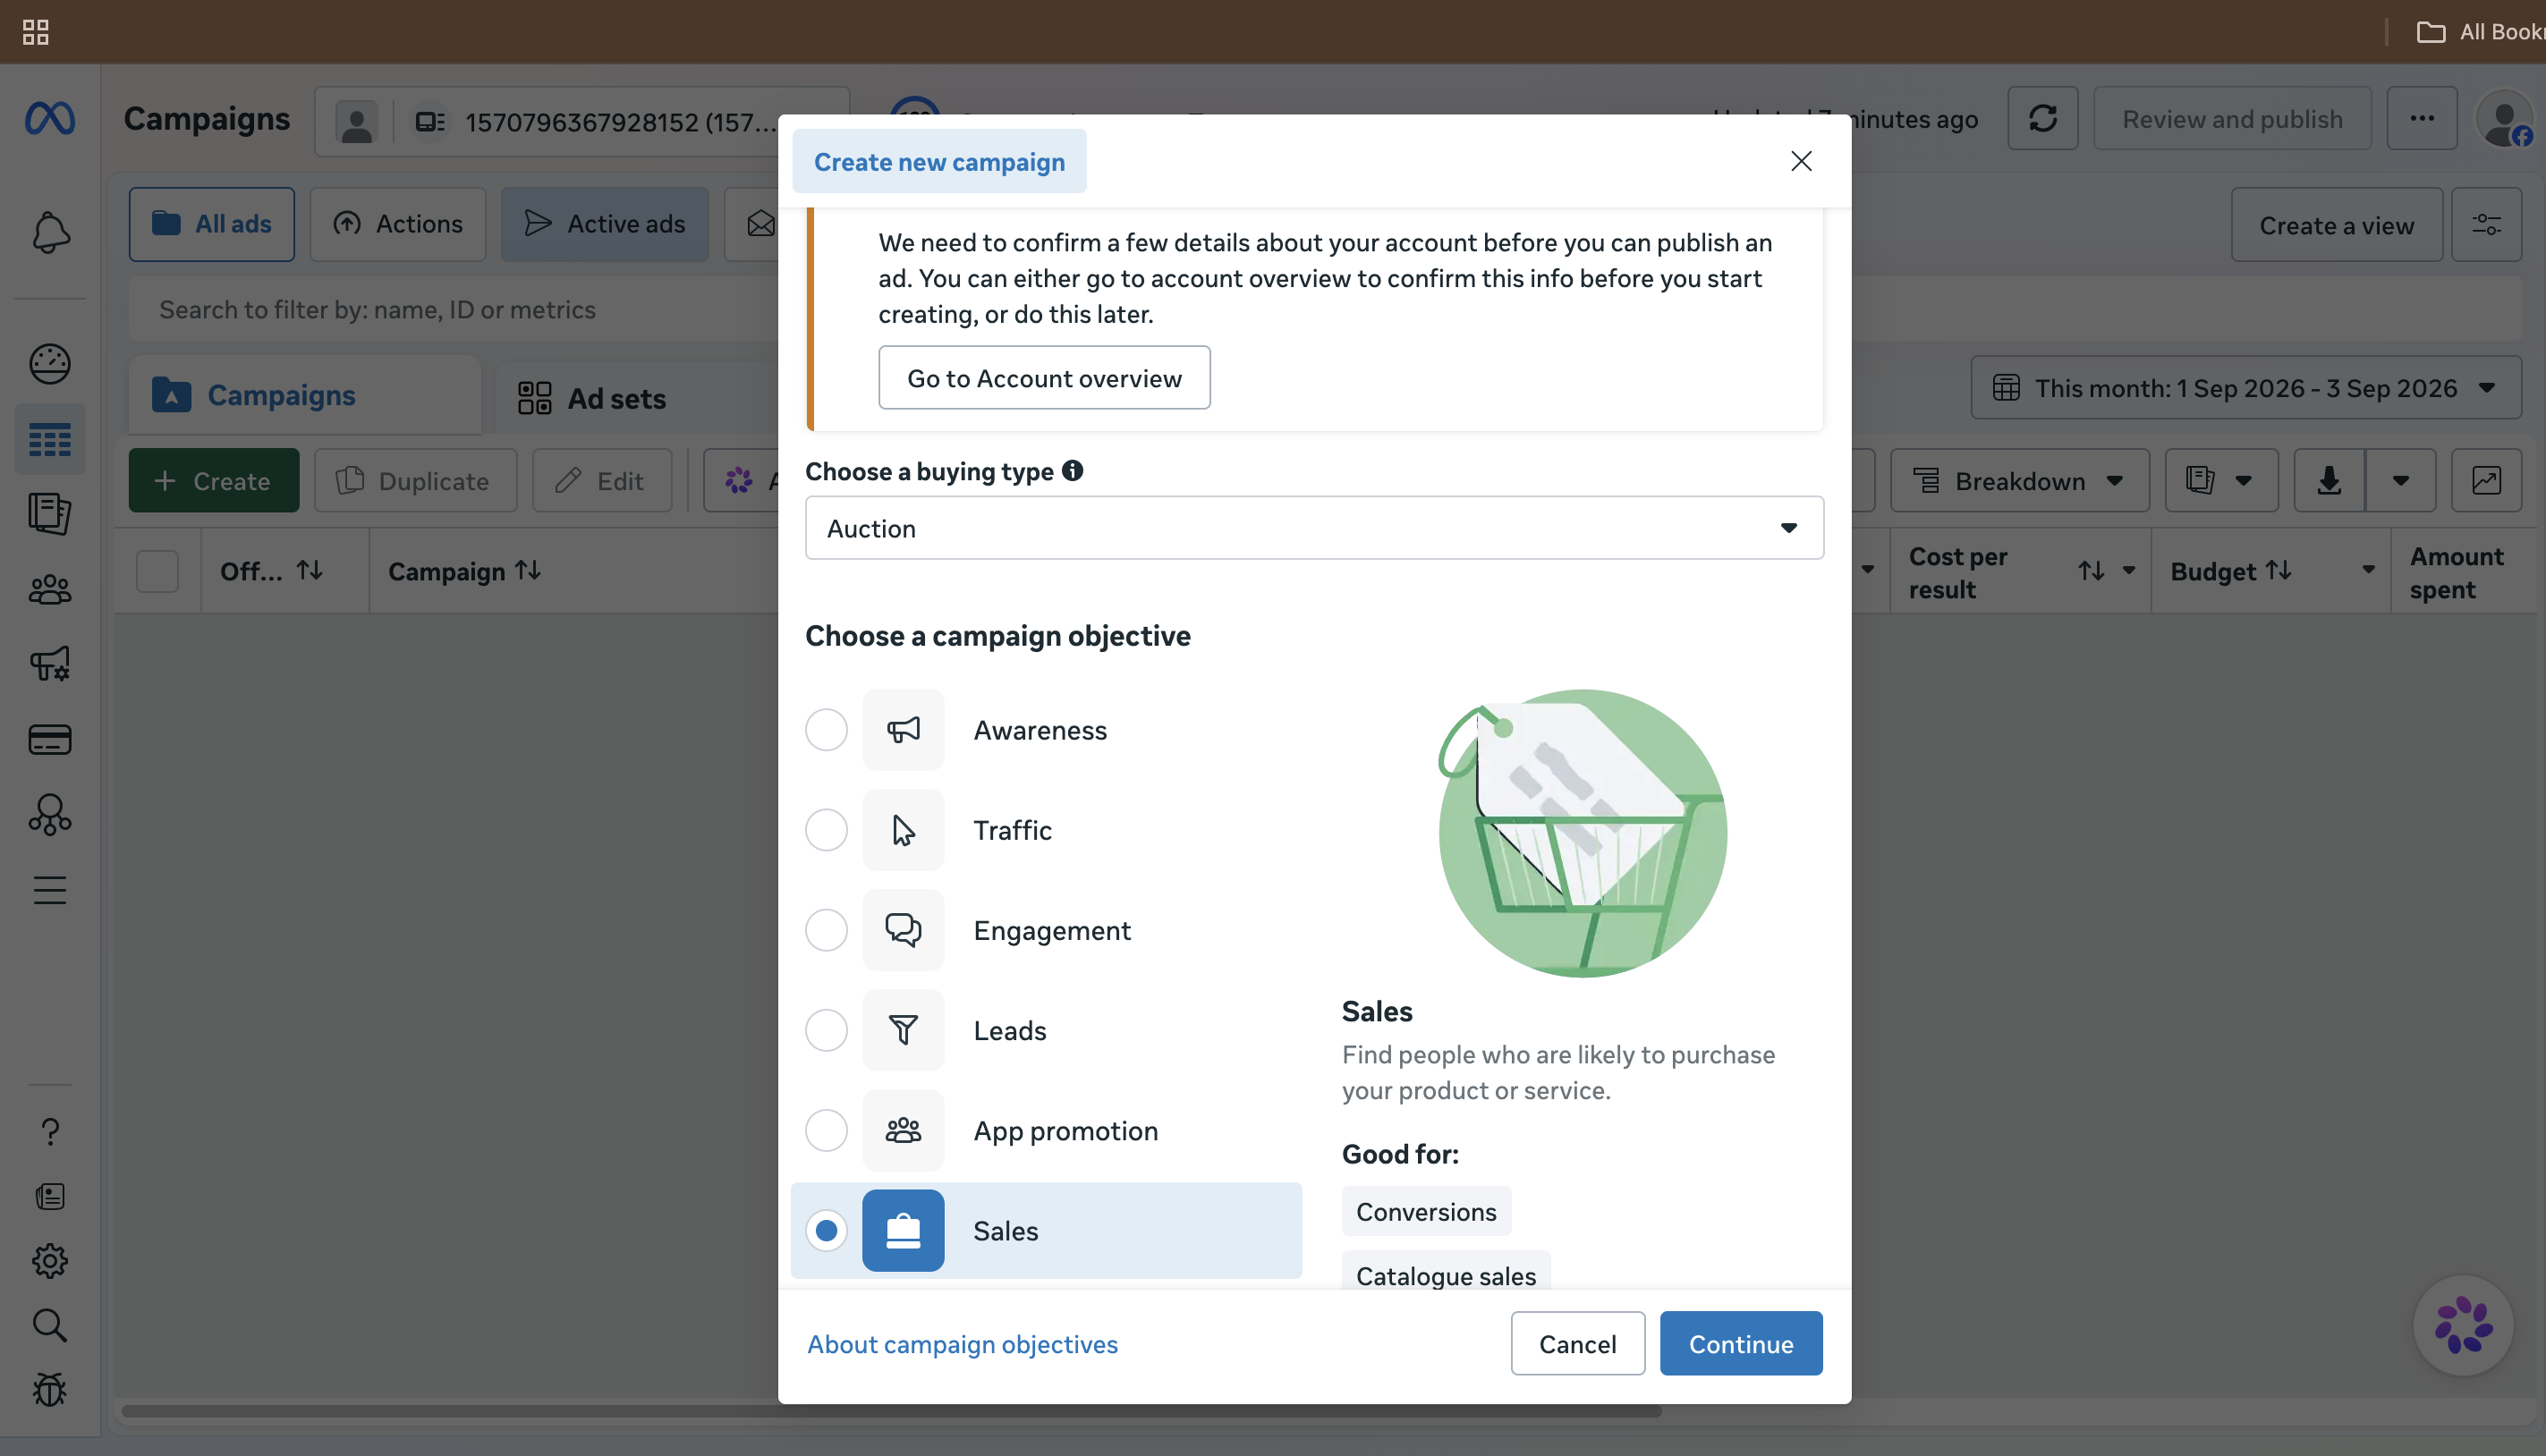
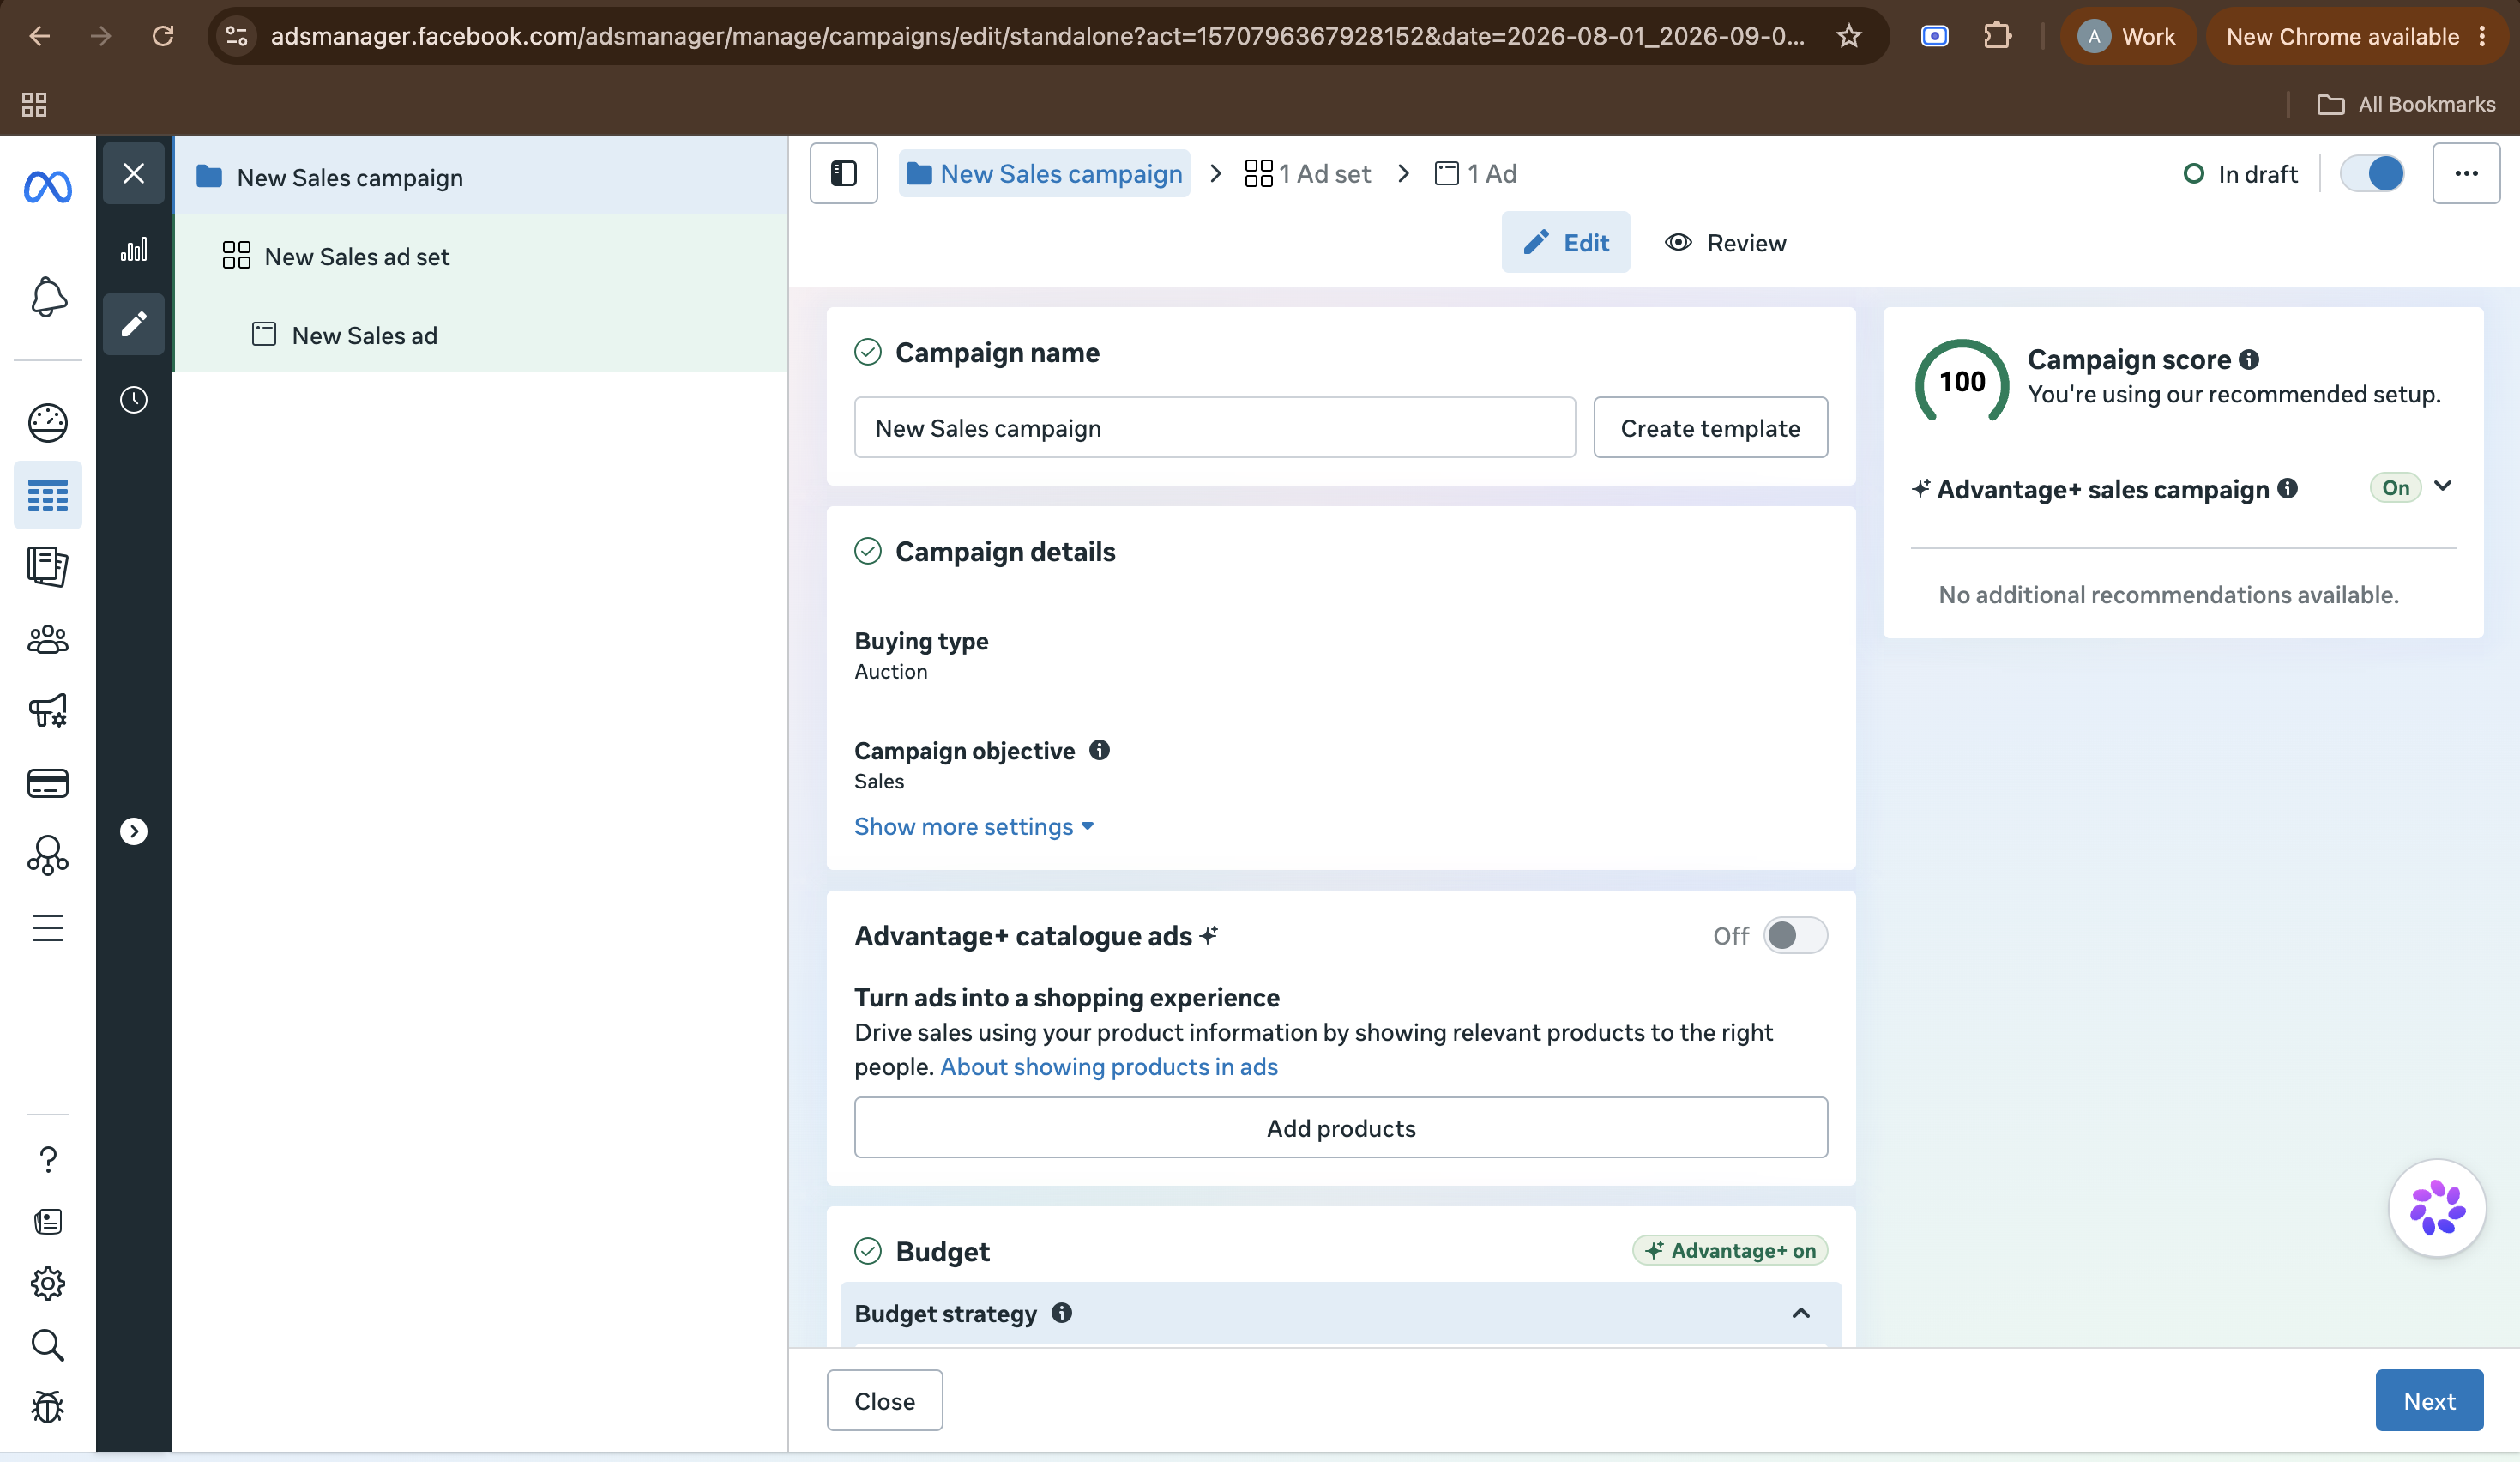
In Meta Ads Manager → Create:
-
Select Sales as the campaign objective.
-
Choose:
- Advantage+ Shopping Campaign for automated e-commerce optimization, or
- Manual Sales Campaign when more control over campaign settings is required.
Note: The Sales objective is recommended when the goal is to drive purchases from your Shopify store.
Expected Result: A Sales campaign is created and ready for configuration.
5.2 Configure Campaign & Ad Set
-
Set Conversion Location to Website.
-
Select your Shopify Pixel/Dataset.
-
Choose Purchase as the conversion event.
-
Select your synced Shopify Product Catalog.
-
Set your:
- Budget
- Audience
- Target Location
-
Use Advantage+ Placements where appropriate.
Expected Result: The campaign is connected to your Shopify tracking setup and product catalog and is configured to optimize for purchases.
5.3 Create Product Ad
At the Ad level:
- Select your Facebook Page Account.
- Select the Catalog/Dynamic Product Ad option.
- Add your primary ad text.
- Select Shop Now as the call-to-action.
- Review the product preview.
Verify that the following information is displayed correctly:
- Product image
- Product name
- Price
- Availability
Expected Result: The ad dynamically displays products from your Shopify Product Catalog.
5.4 Review & Publish
- Review the campaign settings, audience, catalog, and ad preview.
- Check for any warnings or errors.
- Confirm that all product information is correct.
- Click Publish.
Note: Meta may review the campaign before it starts delivering.
Expected Result: The campaign is submitted to Meta for review and can begin delivering once approved.